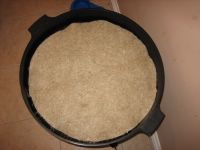
The more adventurous worms can be seen just under (or even within and on top of) the moisture mat now, so they have obviously managed to find their way up through the bottom of level 3 into the newly added waste (hooray!).
Worm Farming
A diary of setting up and maintaining a wormery (scroll down to the bottom if you want to start at the beginning of the story!).
Sunday, January 29, 2006
Saturday, January 28, 2006
The worms seem to have settled down in that they are not often to be found on the inside of the lid, or in the bottom level (collector tray/sump) any more (too busy eating waste hopefully!).
Friday, January 27, 2006
The level of waste has reached the top of the ribs on the inside of level 2 now, so I have put level 3 on top. The waste in level 2 has started to go "furry" with mould and the worms are active near the top of the waste. The waste touches the bottom of level 3 and I am now adding new waste into level 3. The moisture mat covers the newly added waste. On reading this back to myself I realise it all sounds very complicated, but it's not, so if you're thinking of having a go, don't let that put you off!
Thursday, January 26, 2006
Checked the bottom level of wormery today and found there were some escapees in there, also some brown sludgy stuff and a small amount of liquid. I don't think it was worm casts or the potent fertiliser, I think it was worm bedding that had dropped through and rain water. Drained off the liquid and chucked it down the sink and returned the worms to the food/waste level.

Thursday, January 12, 2006
There had been a frost during the night but the worms still seem pretty active. When I had a peek under the moisture mat late afternoon, there was lots of activity. Can't see any obvious sign of all the matter (bedding and food) sinking as it is supposed to do but maybe it's too early.
Wednesday, January 11, 2006
Since we have put the worms in the wormery (and outside) it has been raining most of the time. In the wild (apparently) when it rains, worms come to the surface to avoid drowning. Our worms are doing this too and when I remove the lid, there are loads of them stuck to the inside of it. The instruction book advises to remove them from the lid and place them back in the wormery (and back to work eating our rubbish).
I must admit (somewhat reluctantly) that handling worms does not come easy to me. Not wishing to transfer this irrational 'discomfort' to our daughter, I steel myself and in the face of Abi's aparent horror, claim "what's the matter? why don't you like them? they're friendly, they're eating our rubbish for us!". I am all smiles and have a voice that is pitched rather too high. Abi is 3 years old and not to be fooled by my unconvincing charade. She nobly declares however that next time she may "hold a baby one".
Tuesday, January 10, 2006
After allowing the worms an afternoon in the kitchen, we thought it was time to introduce them to their new neighbourhood, so we put the lid on top of the Can O Worms (and rain-cover!) and put them outside the kitchen door (next to the wheely bins). Quite a 'des-res' for a worm!

The dissolved bedding block resembled used tea leaves. As instructed, we placed the cardboard disk that formed part of the outer packaging for the Can O Worms in the bottom of level 2. We then spread the dissolved bedding block on top of this (see above).
In the picture above, you can see the bottom level and the 2nd level (which fits into it). There are two more levels to go (which we will add in a few weeks apparently), a plastic lid and a breatable material rain cover (optional extra which I'm glad we got).

Having failed at traditional composting (there was no hatch in the bottom of our composter to retrieve the composted material!). We decided, with the start of 2006, to try a Wormery. Our 3 year old daughter (Abi) is delighted at having hundreds of new pets!
We ordered a 'Can O Worms' on-line from 'Wiggley Wigglers' (see under links) and several days later, a man arrived at the door with a large black plastic barrel and 1kg of worms!


